How to Use Your Classroom Space to Get Ready for the Test
At this point in the school year, your students have amassed a great deal of notes, worksheets, and tests. These are all great tools from which they can review and prepare for the test. The problem is that most of the information gets filed away and stored on a shelf, placed inside a desk, or stuffed into a backpack. The problem with this is …
“If it’s out of sight, then it’s out of mind.”
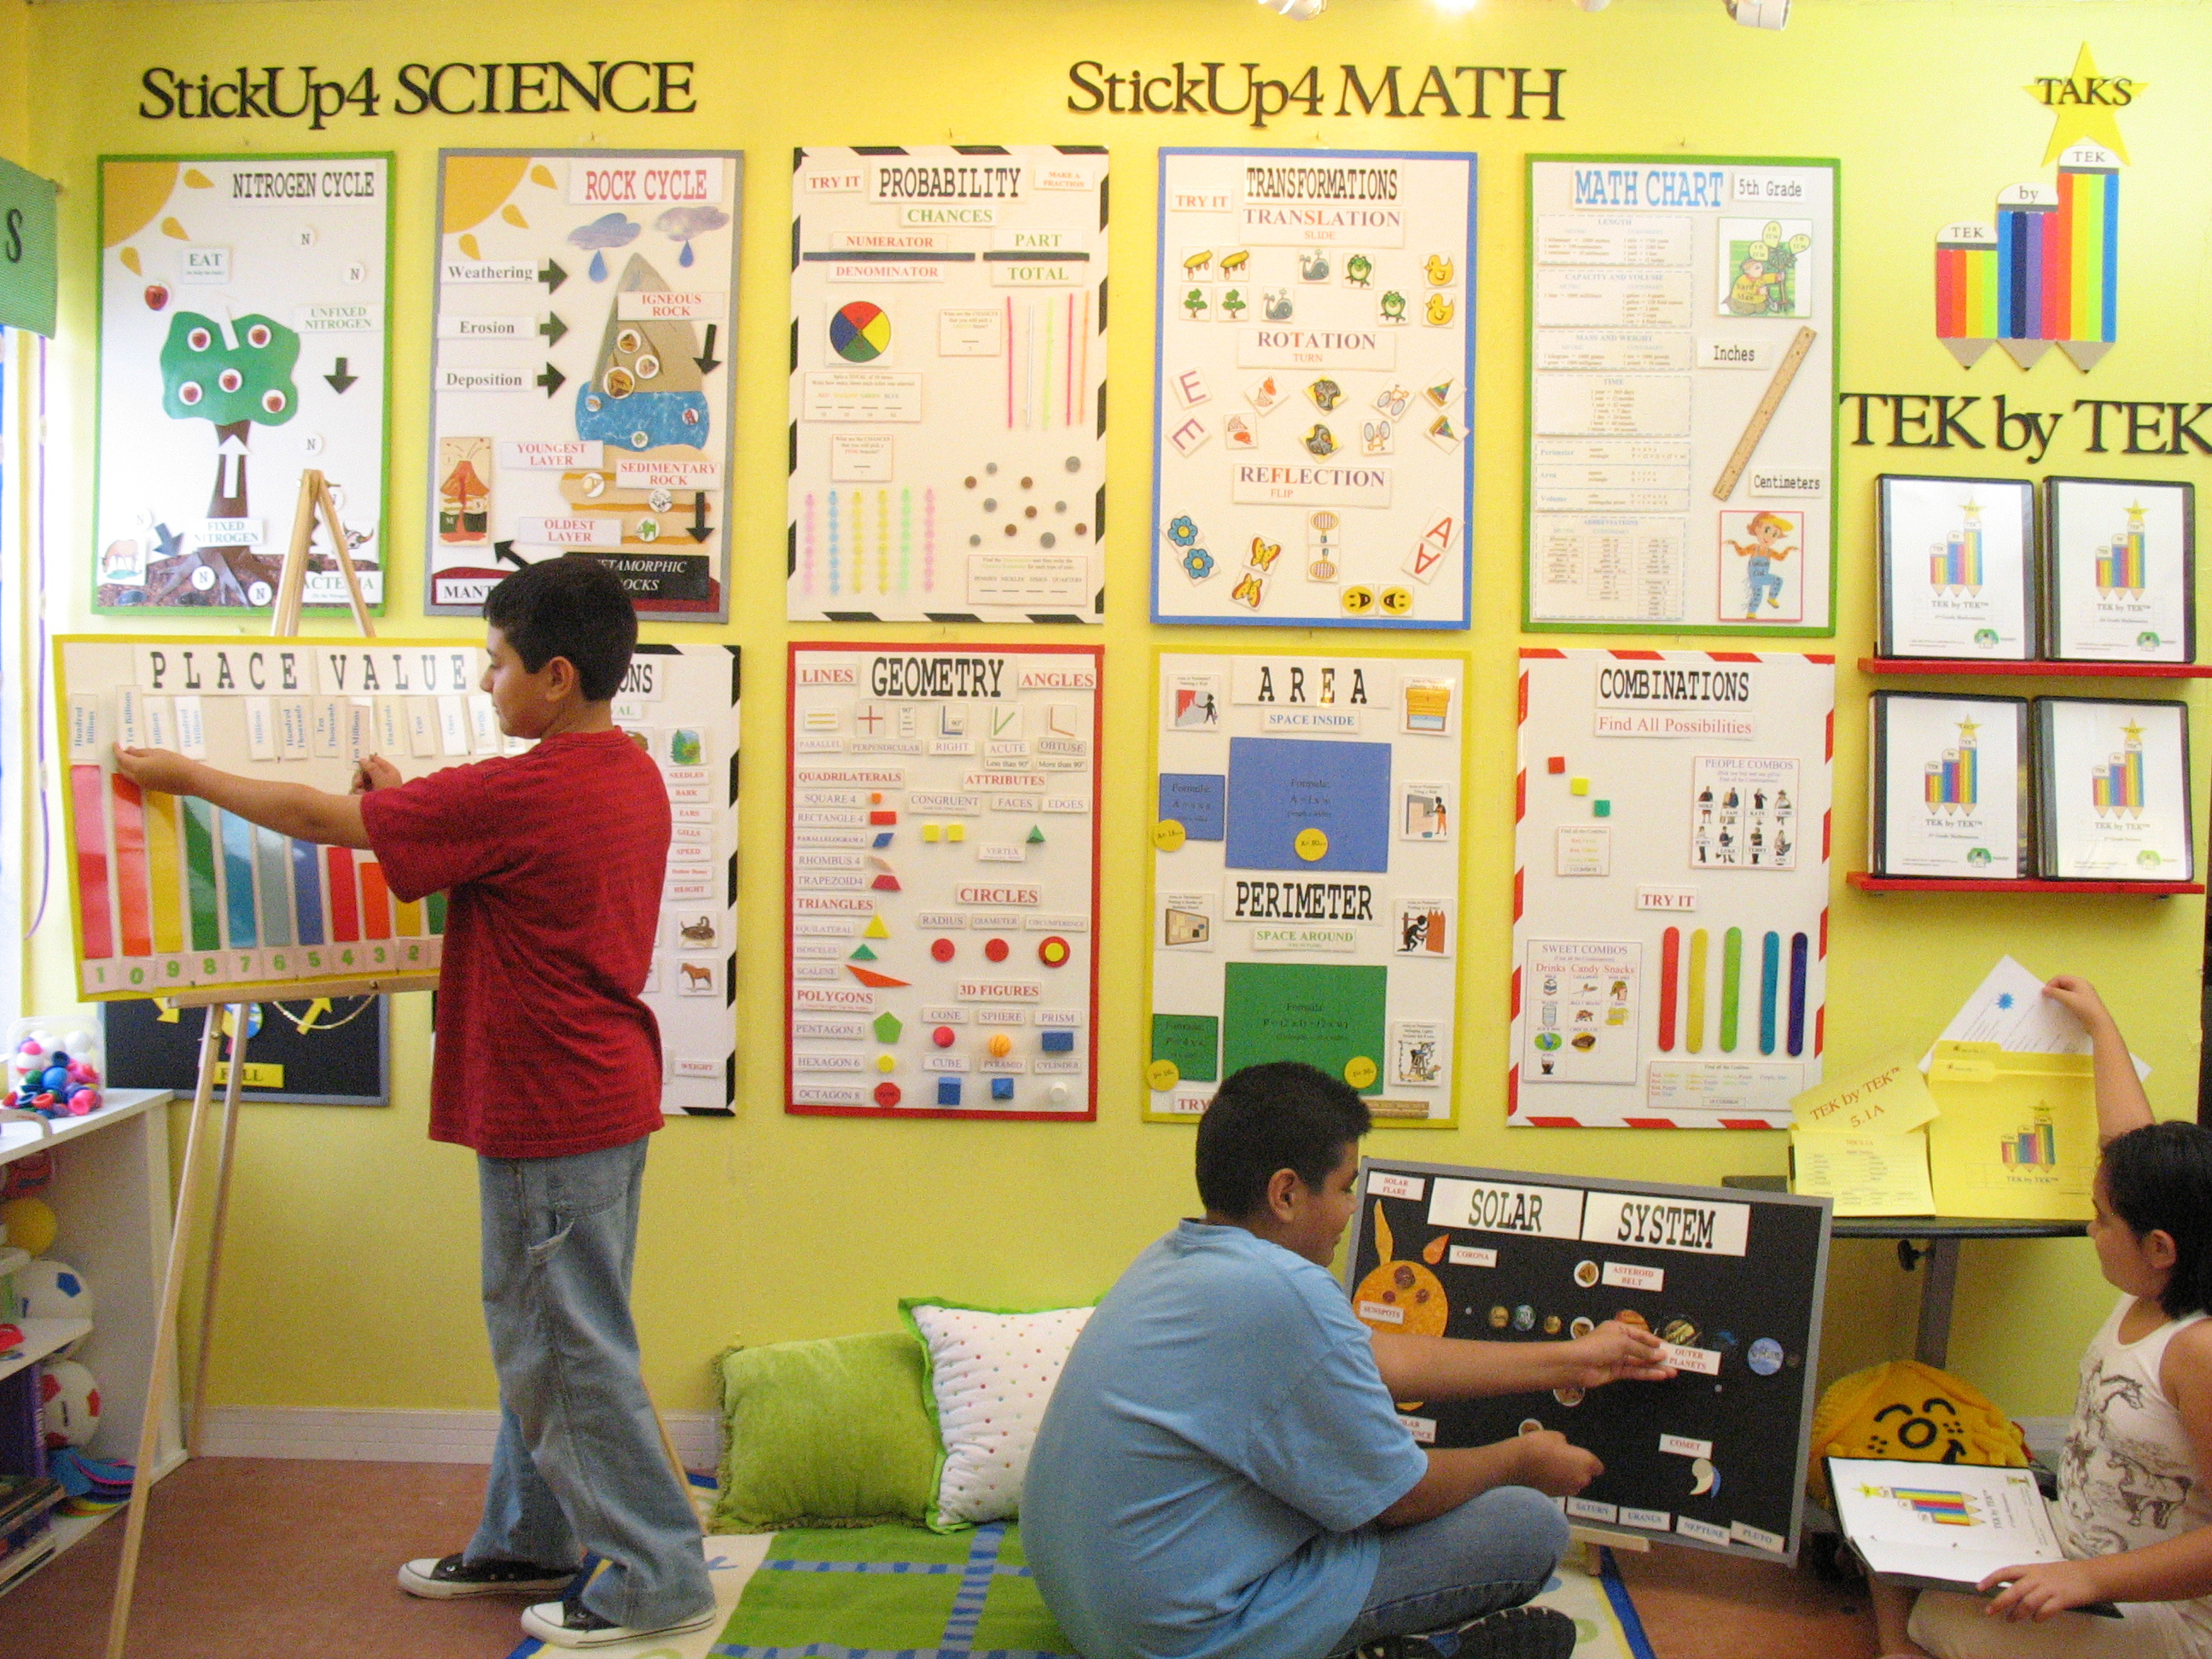
It’s time to maximize the wall, ceiling, and floor space in the classroom. This is going to be an investment in time and even a few dollars to buy poster boards, but time and money will be well spent.
Your mission is to only display CONTENT-Related information.
1 – Clear off any non-content related displays
They have served their purpose throughout the year, but we now have to be strategic about the space. Please clear away student work which is not content-related. If the student work does demonstrate content, then please make sure it is an exemplar, clear, and large enough to see from a distance.
2 – Determine what and how much information you want to display
List the objectives your students have to learn. Determine if you need to display each objective. You may not need to post some of the simpler ideas which have been mastered by most of your students. Count up the number of objectives which will need to be displayed.
3 – Prepare your displays
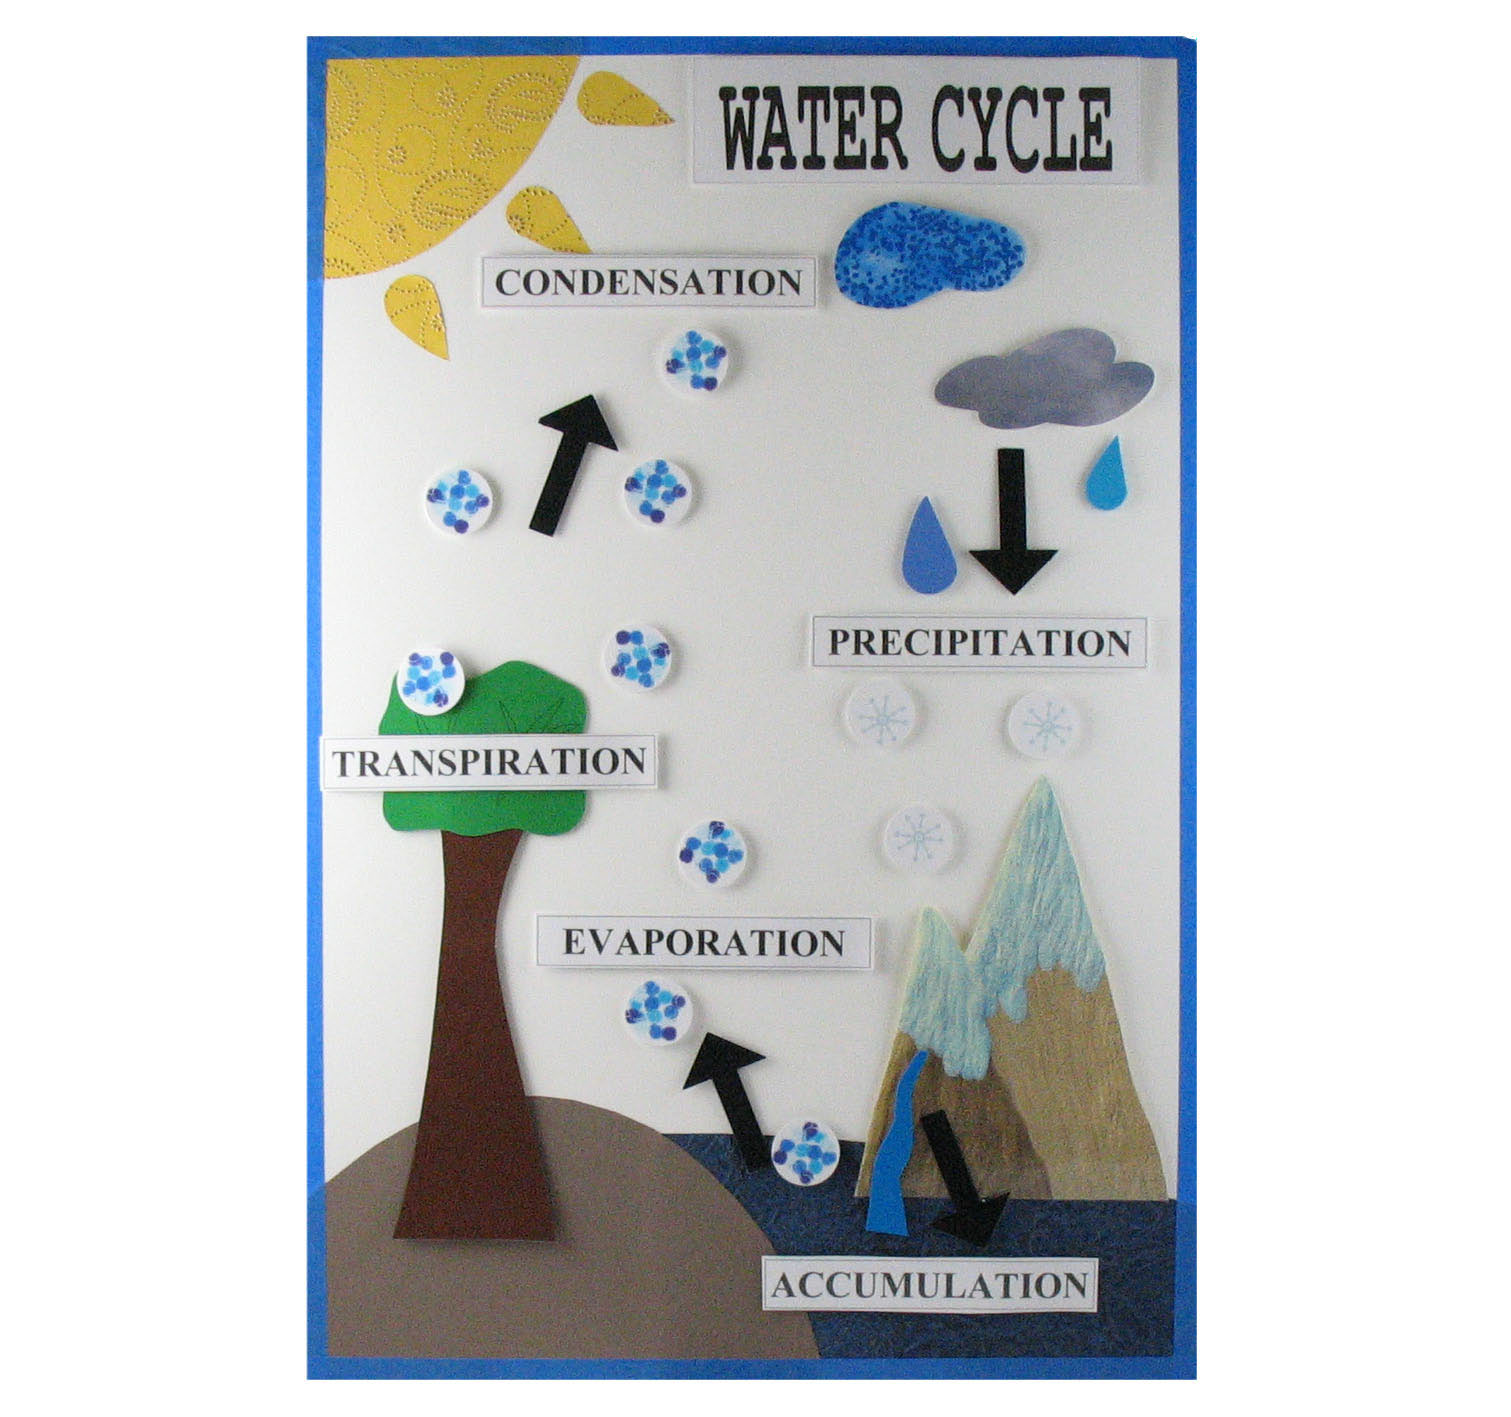 You can use poster board or foam board to create your displays. This is where the bulk of your preparation time will be invested. You can cut up a full poster into 2, 3, or 4 pieces. You may be tempted to make “perfect” and beautiful displays, but at this point in the year perfection and beauty are not necessary. Be sure to laminate your posters once they are finished. Use a black permanent marker to list the bulk of the information and a colored permanent marker to highlight key terms or ideas. The information should be clear and large enough to be seen by students who are across the room. Your posters should include:
– a title, which is usually the objective
– key terms and definitions
– strategies or processes
– an example or two of how to apply the strategy or solve a problem
– a visual that will help the student recall the information
4 – Sketch and plan your space
Now that the walls are clear, you can sketch out a plan for where to display the information your students will need to know for the test. You can use a sheet of copy paper to draw a rough outline of your classroom. Plan where you will display each objective. Will they follow a numerical sequence or is there a logical reason for displaying them in a certain way? There are various ways to post your displays, but the most effective way is to use hooks or hook and loop tape so the displays can easily be removed from the walls.
5 – Using the posters
Students can walk around the room to study the displays. They can also take notes and create study sheets. They can take the displays off the wall and review them at their desks. You can evaluate their learning and retention through facilitation, Q and A sessions, or games.
In the comments section below, please share how you will use your classroom space to prepare for the test. Let me know how many displays you created. Do you have any questions? If so, please post them here or feel free to send an email to vlopez@treetopsecret.com